
If you’re a planner addict, then you probably already know how great Pinterest is: you can very easily find a lot of awesome printable planner stickers. If you’re new to the planner world, then don’t lose a minute and go discover all the cool stuff that Pinterest has in store for you. I like to save the best ones I find on this Pinterest board, feel free to follow it and PIN ON!
To find printables on Pinterest simply type keywords like planner stickers, free planner printable, free planner stickers, free planner inserts… To narrow it down, you may also add the name of your planner or the type of stickers you’re looking for.
Ok, well, pretty obvious stuff so far.
You found great PDF printable planner stickers, now what? How do you turn this digital beauty into actual cute stickers?
In this article I’ll recap the various solutions to help you do that with my files or with any other PDF you’d find online.
What are the different ways to turn a printable into planner stickers?
Once printed, creating stickers requires two main steps: cutting and sticking. Solutions will vary depending on what type of materials you own and decide to use to cut and to stick. You only need at least one tool to cut and one tool to stick. I like that there can be a different solution for everyone.
To cut, you have to choose between one of these 3 tools:
- a good old pair of scissors / X-acto knife
- a Gyrocutter (aka GYRO-CUT®)
- a cutting machine (I’ll only talk about the Silhouette machine as this is the one I own)
The “sticking” part will depend on the type of paper you decided to use to print your planner stickers:
- If you printed on Sticker paper or mailing labels: once the cutting is done, you’re good to go. YAY stickers.
- If you printed on classic paper (=non sticky) you have one more step to turn your “cuts” into actual “stickers”.
To add stick to them you can either use:- glue, glue pen or double sided tape
- a Xyron sticker maker
 to create planner stickers: how to easily turn any PDF printable into actual planner stickers (with or without a cutting machine)")
Like it? Pin it for later!
So, again, if you have at least one of these items in the cutting category and the sticking category then you’ll be able to create planner stickers. The cheapest and most basic solution would be to print on classic paper, cut with scissors/X-acto knife and stick them in your planner with glue. This solution is therefore the cheapest but it’s also the most time consuming one.
So if you’re a little tired of this solution or if you’d like to find out what the other materials I mentioned above are all about, keep reading, I’ll try to explain for each one how they can help you make stickers, advantages and prices so that you can decide which one would be best for you.
To cover this topic thoroughly this article is fairly long, so in order to make it more manageable, I’ve decided to divide it into sections:
- What paper should I use to maker planner stickers?
- How to make planner stickers with the Xyron?
- How to use a Gyrocutter (GYRO-CUT®) to make planner stickers?
- Silhouette machines and Silhouette Studio software to create planner stickers
- How to turn a printable into planner stickers with a Silhouette machine?
Disclaimer: This article contains Affiliate links. It also contains Amazon ads to help you find and see the different tools I’m talking about, turn off your Ad blocker if you want to see every images.
What paper should I use to make planner stickers?
If you’re planning on making stickers for your planner on a fairly regular basis then I definitely recommend getting sticker paper. There is actually different kinds of sticker paper, so you can just pick one that fits your budget and needs the most:
- Shipping labels / Multi-purpose labels: make sure to pick the ones that are sized as one big sheet (8,5×11″ or A4 depending on where you live – like this pack). It’s the cheapest kind of sticker paper and it tends to be a little thinner than “real” sticker paper.
- Sticker paper: several brands have created their own type of sticker paper, you’ll have to pick the one you like best. Online labels is specialized in that and offers an impressive range of sticker paper, I’ve heard good things but I’ve never tried it though. I like Staples Matte Sticker Paper.
- Removable sticker paper: the name says it all, this sticker paper is removable, whereas classical sticker paper isn’t meant to be removed.
- Clear sticker paper: Instead of having a white sticker sheet to print on, you get a clear sticker sheet. That means that the borders around your stickers will be less visible, even if you don’t cut perfectly around them.
You can find most on Amazon:
I personally use two types of sticker paper: the Staples Matte sticker paper and a cheaper kind that I got from Office Depot called “Office Depot Multi-purpose labels”.
I like having a cheaper one around because this way I really feel free to use as much as I want, I don’t need to overthink and ask myself “do I really want these stickers” before printing something.
I use the nicer one (Staples Matte sticker paper) for the stickers I care the most about. I’d say that the main difference is that the shipping labels are thinner and the color are slightly less vibrant. But really, it’s all good.
How to make planner stickers with the Xyron?
If you didn’t print on sticker paper, there is several Xyron machines that will help you turn pieces of paper into stickers, their main difference is how wide the pieces you feed can be : Xyron sticker maker (1,5″), Xyron create a sticker (up to 5″), Xyron 510 Creative Station (up to 5″ and has more functions: can add sticker, magnet backing, removable sticker…).
You feed them into the slot and the machine adds a thin layer of “sticky” substance on the back of it. You can then take it off of the sheet and you’ll notice that your piece of paper now has a sticky backing. Tadaaa, stickers!
These machines are very easy to use and don’t require electricity, you’ll simply have to twist the nob to get it to work. You’ll be able to purchase the machines and refills easily on Amazon:
How to use a gyrocutter (GYRO-CUT®) to make planner stickers?
A gyrocutter is basically a very smart cutter that helps you cut any shape you like: GYRO-CUT® is a hand-held tool with a 360 degree rotating blade craft that enables you to cut very complex shapes easily and quickly. It can cut thin sheet material such as paper and vinyl. In this little video you can see @LaurennotLoren use her gyrocutter to cut some Lovely Planner stickers (you can find these cute starbucks cups stickers here).
This should help you understand how it works!
You can find this smart little tool on Amazon.
What’s really nice about it is that you can use it to kiss-cut stickers. This means that, if you printed on sticker paper, you can use this tool to cut through the first layer but not the backing. This way, your stickers stay all on one sheet in the end.
https://www.instagram.com/p/BNxvXXvAOZn/?taken-by=laurennotloren
How to create planner stickers with a Silhouette machine
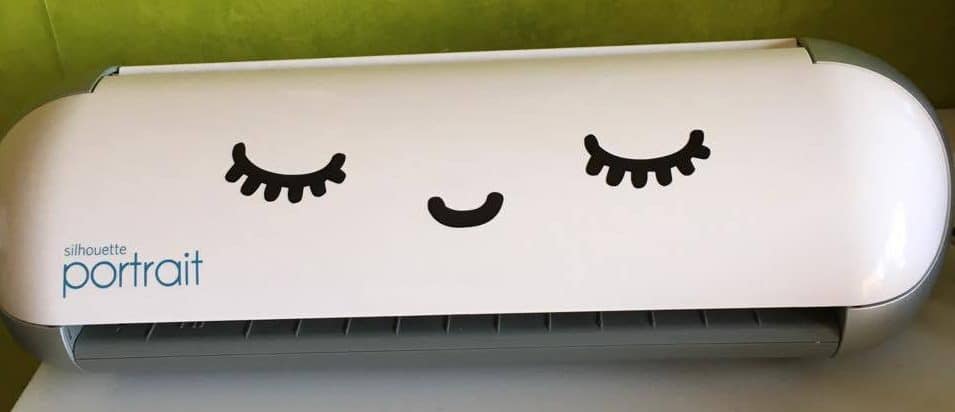
Want to know how to give an adorable look to your Silhouette machine? Head over here.
Now comes the quickest solution of all others but it’s also the priciest one.
That being said, if you’re planning on creating a lot of stickers, the investment could very well quickly be worth it. Sitckers on Etsy aren’t always so cheap, so if you’d rather make them than pay for them, purchasing a Silhouette might be a solution for you. Plus, there is so many things you can create with a Silhouette machine that it will become your best crafty buddy if you like crafting in general.
The Silhouette machines (Portrait and Cameo) are electronic cutting tools. You can simply connect them to your computer with a USB cable, prepare your file and then cut a large variety of material (paper, vinyl, heat transfer vinyl, cardstock…).
You’ll have to adjust the cutting settings depending on the material you’re cutting.The machine can also register and cut printed materials such as planner stickers, die cuts, etc. But don’t worry about the settings, you can find lots of tutorial and tips online!
Right now, there is 3 different Silhouette cutting machines you can get:
- Silhouette Portrait: the cutting area is 8×12″, which is perfect if you’re planning on using it mainly for stickers. That’s the machine I have and I love it. The size is perfectly enough for me, even when I use it for other crafty projects.
- Silhouette CAMEO: the cutting area is 12×12″, so, if you prefer having a bigger mat for all your crafty needs, the Silhouette CAMEO could be a better fit.
Note: Besides the size difference, the Silhouette Portrait and Silhouette CAMEO have the same functions. - Silhouette CAMEO 3: this machine is the newest model, the cutting area is 12×12″ and you can now use 2 blades at once.
You can find them all on Amazon, look around the whole website, you can also get different bundles if you prefer:
Silhouette Studio software is a great tool to create printable planner stickers, even if you don’t plan on getting the machine

To use this machine, you first need to prepare your file on your computer with the free software Silhouette Studio. You can download this software for free here even if you don’t have the machine (yet). You can try playing around with the Silhouette Studio Software and see how you like it! The software has some really convenient features to create stickers printable (such as: replicate, patterns, shapes for example) so I recommend downloading it if you’re planning on creating your own printable planner stickers. You can save your file as PDF so Silhouette studio is a great free tool even if you don’t plan on buying the machine.
How to turn a printable into planner stickers with a Silhouette machine?
Most blogs share printables in PDF format. A few blogs also share a Silhouette cut file and, if you have a Silhouette machine, it’s really convenient to be able to download a Silhouette file that’s already ready to be printed and cut. It saves you lots of time. i’ll explain how to cut both types of files.
Note: I used to share cut file at the beginning of my blog, but it was a lot more work and some of my files got stolen and resold so I’m now only sharing the PDF files for my freebies
If you don’t have a Silhouette machine, then, the Silhouette Studio file won’t be of any help to you as you won’t be able to open it or use it without the Silhouette Studio software, in this case, just download the Pdf, print it with your other favorite tool (scissors, X-acto knife, gyrocutter).
Now, here’s a few tips to transform your printable into stickers with a Silhouette machine. Depending on the type of file your printable is: PDF or Silhouette Studio file.
- If the Silhouette Studio file is available to download:
- Open your Silhouette Studio file with the Silhouette Studio software. The file has already been prepared with cut lines by the blogger who shared the file so usually you have nothing more to do besides checking that every cut lines seem fine (please remember that we, FREE printable givers, are only human and we can make mistakes too).
- You also have to check that the registration marks appear well before printing.
- Print your file: “File”>”Print” in Silhouette Studio software, with the registration marks still on. The machine will need to be able to read the registration marks to be able to cut precisely where needed. Print on sticker paper preferably (see recommendations above regarding sticker paper).
- Once your file is printed with registration marks and your design, add it to your cutting mat and feed it into your Silhouette machine.
- Click “Cut settings”, the button with a little blade on the right corner of your screen (the icon before last). There, select the type of material you’re gonna use and adjust the cutting settings if needed. When ready, click “send to silhouette”.
When I use the Staples Matte paper sticker I use the settings blade 2, speed 10 and thickness 18 to kiss cut my stickers, you’re probably going to need to adjust that depending on your paper and your blade. - The machine will first read the registration marks and then start cutting your cute little stickers! Wait and enjoy!
- If only the PDF file is available to download:
-
- If you have the Silhouette Designer Edition: you’ll be able to import PDF files into the Silhouette Studio software. To do so, you can click on “File”->”Open” and select your PDF on your computer. A new window will appear, asking you to specify how you want to import this PDF. Select “Import as image” and “300 DPI”, as in this screen capture:
 to create planner stickers: how to easily turn any PDF printable into actual planner stickers (with or without a cutting machine)")
- If you don’t have the Silhouette Designer Edition, that means if you have the free Silhouette software, you won’t be able to import PDF into Silhouette directly. You’ll have to turn it into a JPEG before working on it in the Silhouette Studio.
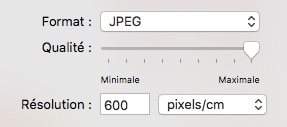
To do so, you can use this free website service (select the highest DPI quality you can) or, if you have a Mac, you can also do that by opening your file in Preview, then hit “File>Preview>Export> select JPEG max quality 600dpi.”

- You can now add your JPEG image in the Silhouette Studio software. This should take the whole space of your space since the printable was originally meant to be printed on a whole page.
- Click on the tracing tool, click “Select trace Area” and select a trace area around your stickers, then untick the box “High Pass filter” and raise the Threshold until all your stickers turn yellow. Then click “trace outer edge”.
 to create planner stickers: how to easily turn any PDF printable into actual planner stickers (with or without a cutting machine)") You now can see a red line around your design, this is where the Silhouette machine will cut.
You now can see a red line around your design, this is where the Silhouette machine will cut. - If you want a white border around your stickers, you’re gonna need to double click on one of the red line we just created and then click “Offset”. There, you can adjust the width of the offset you want to create. Once your offset is created, don’t forget to double click on the initial tracing and delete it. The machine will now only cut where the tracing offsets lines appear. Pretty cool.
- Add the registration marks and follow the same steps I mentioned right above for print and cut.
Voilà, you can now add stickers everywhere!
- If you have the Silhouette Designer Edition: you’ll be able to import PDF files into the Silhouette Studio software. To do so, you can click on “File”->”Open” and select your PDF on your computer. A new window will appear, asking you to specify how you want to import this PDF. Select “Import as image” and “300 DPI”, as in this screen capture:
-
 to create planner stickers: how to easily turn any PDF printable into actual planner stickers (with or without a cutting machine)")
 to create planner stickers: how to easily turn any PDF printable into actual planner stickers (with or without a cutting machine)") You now can see a red line around your design, this is where the Silhouette machine will cut.
You now can see a red line around your design, this is where the Silhouette machine will cut.
18 comments
Great info! Thank you
I love your stickers so much! I am super bummed that I can’t figure out how to make them work with my cricut. I read above that you would only give instructions for the Silhouette. Can you give me any advice for using my new cricut? Thank you 🙂
I have a cricut machine and if u use a file converter and change the PDF file to SUV and you can insert to cricut also u can ask the support team
Awesome! Thank you!
Hello!
I am new at this thing of print stickers and everything. I saw that I can buy a machine to do them? SO nice! Do you know where and everything? I would be awesome If you could explain everything to me.
I love your website. I downloaded almost 100% of it
[…] what’s the best way to turn this printable into actual planner stickers, make sure to check my article with tips and tools that will help you turn any PDF into stickers (with or without a Silhouette […]
[…] what’s the best way to turn this printable into actual planner stickers, make sure to check my article with tips and tools that will help you turn any PDF into stickers (with or without a Silhouette […]
[…] what’s the best way to turn this printable into actual planner stickers, make sure to check my article with tips and tools that will help you turn any PDF into stickers (with or without a Silhouette […]
[…] what’s the best way to turn this printable into actual planner stickers, make sure to check my article with tips and tools that will help you turn any PDF into stickers (with or without a Silhouette […]
[…] what’s the best way to turn this printable into actual planner stickers, make sure to check my article with tips and tools that will help you turn any PDF into stickers (with or without a Silhouette […]
[…] what’s the best way to turn this printable into actual planner stickers, make sure to check my article with tips and tools that will help you turn any PDF into stickers (with or without a Silhouette […]
[…] what’s the best way to turn this printable into actual planner stickers, make sure to check my article with tips and tools that will help you turn any PDF into stickers (with or without a Silhouette […]
[…] If you want more infos about these different supplies, make sure to read the detailed comparative article I wrote about tips and tools you can use to easily turn PDF printables into planner stickers. […]
[…] If you want more infos about these different supplies, make sure to read the detailed comparative article I wrote about tips and tools you can use to easily turn PDF printables into planner stickers. […]
[…] If you want more infos about these different supplies, make sure to read the detailed comparative article I wrote about tips and tools you can use to easily turn PDF printables into planner stickers. […]
Thank you so much for writing and sharing this article! I’m new to all this and you really helped me! And thank you for sharing free printables!
Fantastic article! Super informative! Thank you for sharing!
Just found this blog and I’m obsessed! You are very talented. Thank you for sharing with us!!